Busou Shinki/Little Pullip Frankendollieh!
How to make a Little Pullip happy
I wanted to give my Little Witch a new lease of life, so after gaining inspiration from Pandor I gathered my tools and got to work.
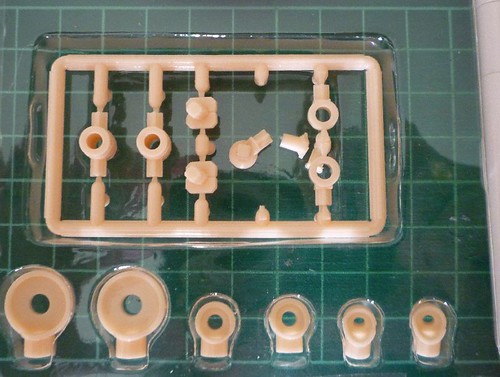
Busou Shinki basic body came with all these wonderful extras, many of which I won't use. But I did find a peg that would fit into the neck and could be used to frankendolly a Little Pullip . . .

Busou Shinki come with all these extras. I am going to have such fun with these hands! And look at those shoes.
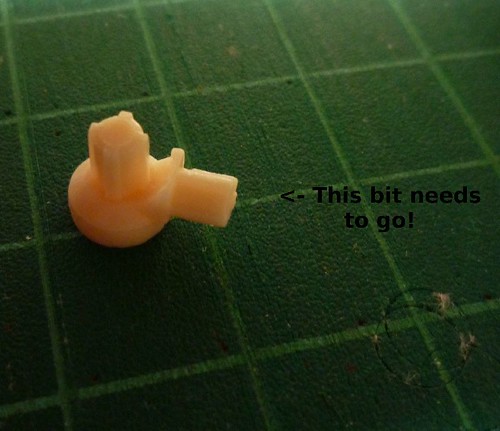
Choose a neck peg. Check which extra fits the best ~ and be careful because the first peg I tried slightly split the neck of the Shinki body. Not to worry too much though, as you'll be glueing later on. In the mean time, cut that extra tag off.
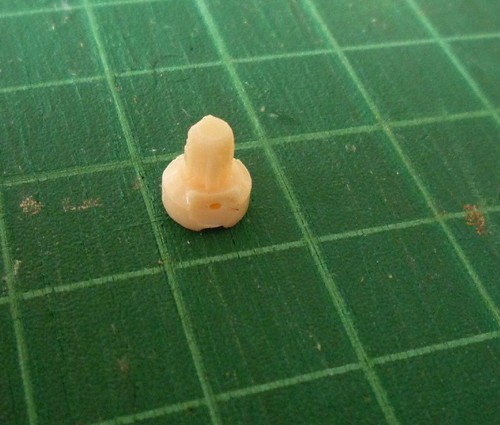
There you are. Easily achieved using a craft knife and a self healing mat. Please note, no fingers were hurt during this procedure.
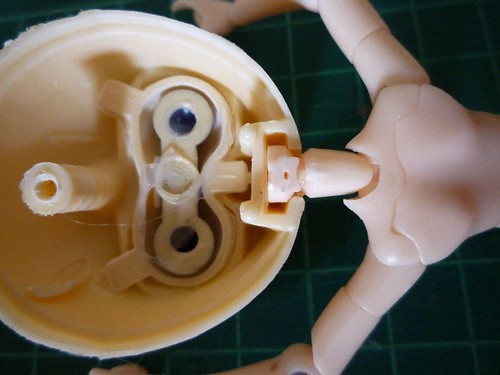
As you can see, the cut down peg fits perfectly into the appropriate hole of the old style Little Pullip head. Now all you need to do is glue the peg into the neck. I used 2 part epoxy as I wanted to make the whole neck join secure after splitting it.
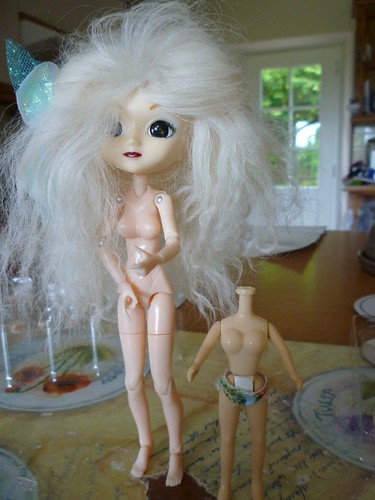
And here is the finished dollieh. Little Witch head nestled on a Busou Shinki body, next to an original Little Pullip one. There is a slight change in colour between the two parts, but not one that is too noticeable when she is wearing clothes.
Naturally, glueing the neck piece on means that I can't change the bust piece of the Shinki, but once again I don't mind that at all.
Hope that this gives someone the inspiration to try it on their dollieh. Good luck.
This Photo Story is generated by PhotoStory Generator. Free & No Download!
I wanted to give my Little Witch a new lease of life, so after gaining inspiration from Pandor I gathered my tools and got to work.

Busou Shinki basic body came with all these wonderful extras, many of which I won't use. But I did find a peg that would fit into the neck and could be used to frankendolly a Little Pullip . . .

Busou Shinki come with all these extras. I am going to have such fun with these hands! And look at those shoes.

Choose a neck peg. Check which extra fits the best ~ and be careful because the first peg I tried slightly split the neck of the Shinki body. Not to worry too much though, as you'll be glueing later on. In the mean time, cut that extra tag off.

There you are. Easily achieved using a craft knife and a self healing mat. Please note, no fingers were hurt during this procedure.

As you can see, the cut down peg fits perfectly into the appropriate hole of the old style Little Pullip head. Now all you need to do is glue the peg into the neck. I used 2 part epoxy as I wanted to make the whole neck join secure after splitting it.

And here is the finished dollieh. Little Witch head nestled on a Busou Shinki body, next to an original Little Pullip one. There is a slight change in colour between the two parts, but not one that is too noticeable when she is wearing clothes.
Naturally, glueing the neck piece on means that I can't change the bust piece of the Shinki, but once again I don't mind that at all.
Hope that this gives someone the inspiration to try it on their dollieh. Good luck.
This Photo Story is generated by PhotoStory Generator. Free & No Download!